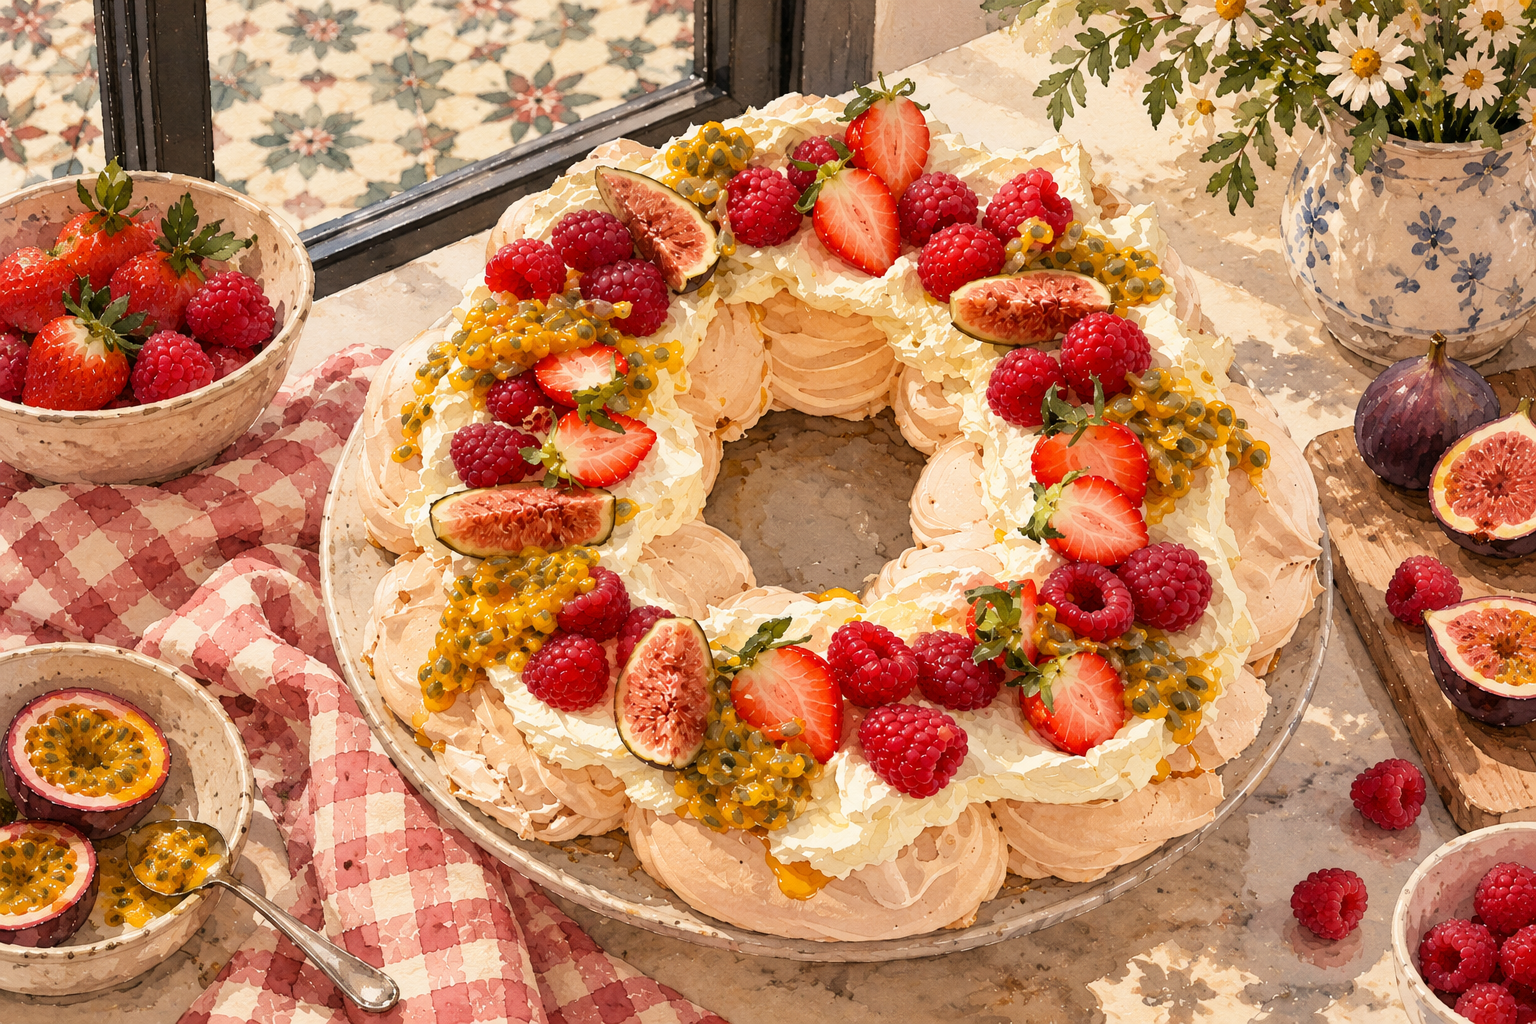
Few desserts make quite the entrance that a pavlova does. Crisp on the outside, wonderfully marshmallowy in the middle and piled high with billowing whipped cream and colourful seasonal fruit. A proper showstopper, without all the fuss.
BACKGROUND
For the longest time, pavlova was one of those desserts I found rather intimidating. There's something about whipping egg whites into a glossy cloud, then trusting your oven not to ruin several hours of hard work, that always seemed a little daunting.
My first proper attempt was for a New Year's Eve dinner with my Australian best friends — because who better to judge your first pavlova than a group of Aussies?
Naturally, I decided that a classic pavlova simply wouldn't do. It was New Year's Eve, after all, so a festive wreath seemed far more appropriate. And while wreaths are traditionally associated with winter and Christmas, living in Singapore has its perks. Namely, an abundance of gorgeous summer fruit all year round. So out came the strawberries, raspberries, figs and passion fruit, and suddenly my very festive pavlova was looking rather tropical.
The result? An absolute triumph, if I do say so myself. Crisp on the outside, wonderfully marshmallowy in the middle and piled high with cream and fruit. We demolished the entire thing in one sitting, which I think is as good an endorsement as any.
And as it turns out, pavlova really isn't nearly as frightening as I'd imagined. A little patience, a lot of restraint when it comes to opening the oven door, and you're rewarded with one of the prettiest desserts you could possibly put on a table. I've been a convert ever since.
Pavlova Wreath with Seasonal Fruit
A beautifully crisp meringue shell with a soft, marshmallowy centre, topped with billowing whipped cream and a generous helping of seasonal fruit. One of my favourite desserts for entertaining — wonderfully impressive, surprisingly simple and even better when made the day before.
Equipment: Stand mixer with whisk attachment, baking tray, baking paper, piping bag and spatula.
Ingredients
For the pavlova
For the topping
Tick off each ingredient as you go. Your ticks will reset when the page reloads.
Method
- Prepare the egg whites. Separate the eggs while they're still cold, as this makes separating the whites from the yolks much easier. Measure out approximately 150ml of egg whites (anything between 140–160ml is fine), then leave them to come to room temperature.
- Preheat the oven. Preheat to 170°C (150°C fan). Line a large baking tray with baking paper and set aside.
- Whisk the egg whites. Place the egg whites in the bowl of a stand mixer fitted with the whisk attachment. Beat on a low-to-medium speed until soft peaks form.
- Gradually add the sugar. With the mixer running, add the caster sugar one tablespoon at a time, allowing it to incorporate before adding the next. Patience is key here — adding the sugar too quickly can affect the texture of your meringue.
-
Whisk until thick and glossy.
Once all the sugar has been added, continue whisking for a few more minutes until the meringue is beautifully thick, glossy and holds stiff peaks.
To check whether it's ready, rub a little between your fingertips. If you can still feel sugar granules, keep whisking until smooth.
And for the ultimate test? Turn the bowl upside down. If the meringue doesn't budge, you're in business. (Perhaps start with a gentle tilt if you're feeling nervous!)
- Add the final ingredients. Add the cornflour and lemon juice, then whisk for just a few seconds until incorporated. Take care not to overmix.
-
Prepare your wreath template.
On a sheet of baking paper, draw a series of overlapping circles to form a wreath, keeping the overall diameter to approximately 8 inches. Flip the paper over so the pencil marks are underneath. Nobody wants a side of graphite with their pavlova!
I personally prefer a taller, more generous pavlova rather than a thin, flat one, so I tend to keep my wreaths relatively compact. You can absolutely make a wider, thinner wreath, but you'll need to adjust the baking time to preserve that lovely chewy centre.
-
Pipe and shape the wreath.
Transfer the meringue into a piping bag without a nozzle and snip a generous opening at the end. Using your template as a guide, pipe each circle individually, building up the meringue into rounded, slightly overlapping swirls until you've formed a complete wreath.
Don't worry about making each circle perfectly uniform — I love the rustic, swirly-whirly texture this creates around the edges. Once you're happy with the shape, take the back of a spoon and gently swirl and smooth the top, creating a shallow, even surface for the cream and fruit while leaving those lovely textured edges intact.
-
Bake low and slow.
Carefully place the pavlova in the oven, gently close the door and immediately reduce the temperature to 115°C (100°C fan). Bake for 1 hour 30 minutes.
And for the love of God, do not open the oven door. Not for a quick peek, not to check the colour, not even if curiosity gets the better of you. Leave it alone!
- Cool overnight. Once the baking time is up, switch off the oven and leave the pavlova inside with the door firmly closed until completely cool, ideally overnight. This gradual cooling helps prevent cracking and gives the meringue time to settle.
- Transfer to a serving platter. Once completely cooled, carefully loosen the pavlova from the baking paper using a palette knife or butter knife if necessary. Gently slide it onto your serving platter, removing the paper from underneath. Take your time here — pavlovas are delicate creatures!
-
Decorate just before serving.
Whip the cream until soft, billowy peaks form, then generously spoon it over the wreath. Finish with your chosen seasonal fruit and a scattering of fresh mint.
I particularly love the combination of tart raspberries, sweet strawberries, fresh figs and passion fruit. The colours are gorgeous, and the sharpness of the fruit cuts beautifully through the sweetness of the meringue.
A little note from my kitchen
Height is everything. I'm firmly in the camp of a tall pavlova with a crisp outer shell and a soft, almost marshmallow-like centre. That's why I keep my wreath relatively compact and build up the meringue rather than spreading it too thinly. After all, it grows when baking!
Make it ahead. One of the joys of pavlova is that the meringue can be made the evening before, leaving you with very little to do on the day. Just keep it dry and don't add the cream or fruit until you're ready to serve.
Don't panic about cracks. A few cracks are perfectly normal, and frankly, part of the charm. Once you've piled on the cream and fruit, nobody will be any the wiser.
Keep the toppings seasonal. While my favourite combination is raspberries, figs, strawberries and passion fruit, you can change things up throughout the year. The important thing is balancing the sweetness of the meringue with fruit that brings a little freshness and acidity.